
How to Add a Smarter Chatbot to Your WordPress Site
Put a Smarter chatbot on WordPress in five minutes, with the Smarter Chat plugin or the @smarter.sh/ui-chat script tag and no plugin at all.

You can put your Smarter chatbot on a WordPress site in about five minutes, with a free plugin or with one script tag.
Smarter is a platform for building and running AI chatbots. You declare a chatbot, called an LLMClient, in a short YAML manifest (its LLM, system prompt, tools, welcome message and look) and Smarter runs it. Its chat window is published on npm as @smarter.sh/ui-chat, with a prebuilt embed script for sites that aren’t built with React, which includes WordPress.
This article shows two ways to use it.
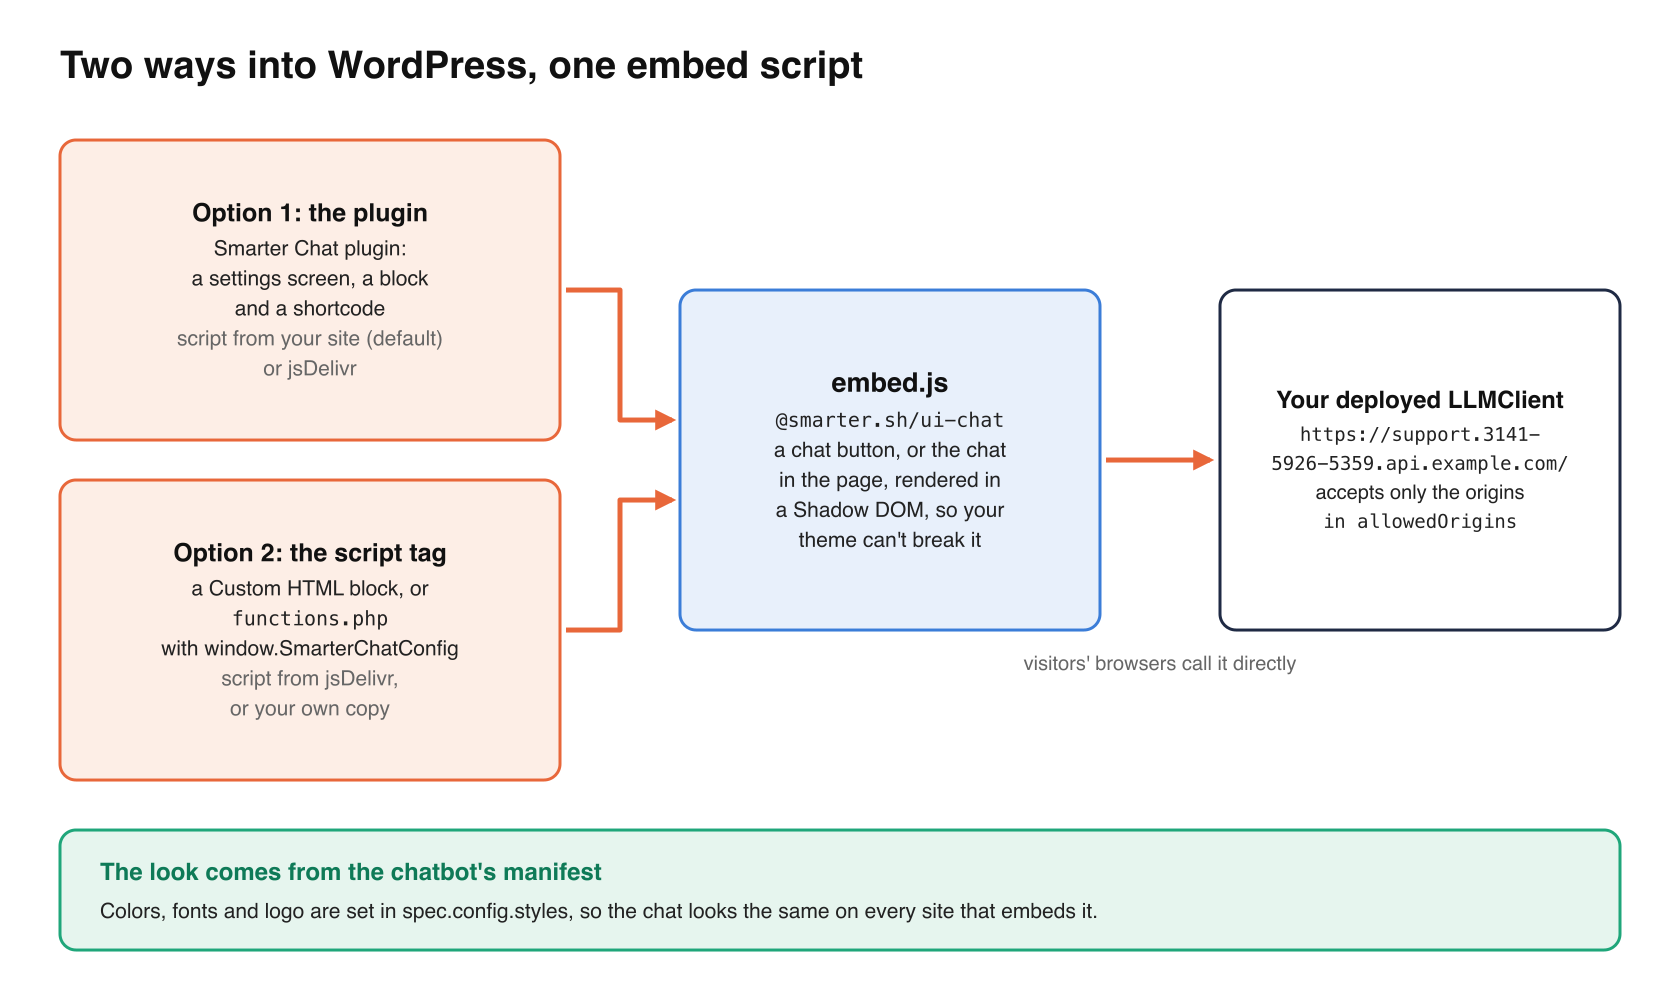
| Option 1, Smarter Chat plugin | Option 2, the script tag with no plugin | |
|---|---|---|
| Best for | Most sites | Sites that limit plugins, or developers who want full control |
| Setup | Settings screen | A Custom HTML block, or a few lines in your theme |
| Placement | Button on every page, a block, a shortcode | Wherever you paste the tag |
| Script served from | Your site (default) or jsDelivr | jsDelivr, or your own copy |
Either way the chat renders in a Shadow DOM, so your theme can’t break it, and its colors, fonts and logo come from the chatbot’s manifest.
Before you start
You need three things, namely a deployed LLMClient, its url, and your site’s origin in its allowedOrigins.
- A deployed LLMClient. Its manifest sets
spec.config.prompt.deployed: true. Its url looks likehttps://support.3141-5926-5359.api.example.com/, or a verified custom domain. - Your site’s origin allowed. Visitors’ browsers call Smarter directly, so Smarter must accept your site. Add the origin exactly as visitors see it (scheme, host and port), plus any staging site.
spec:
  config:
    prompt:
      deployed: true
      allowedOrigins:
        - https://www.example.com
        - https://staging.example.com
- Apply it with
smarter apply -f llmclient.yaml.
You also need a WordPress administrator account. The plugin requires WordPress 6.5 or later and PHP 7.4 or later.
A word about api keys. A deployed LLMClient without api keys is public, and its prompts are charged to its owner. If yours requires a key, the key is written into your pages where any visitor can read it. Use a key made only for this site, or an LLMClient without keys that has a budget.
Option 1, the Smarter Chat plugin
The Smarter Chat plugin wraps the ui-chat embed script in a settings screen, a block and a shortcode. It ships its own copy of the script, so nothing loads from a third party unless you choose to.
Install and connect
- Download
smarter-chat-<version>.zipfrom the plugin’s latest release. - In WordPress, go to Plugins → Add New → Upload Plugin, choose the zip, then Install Now and Activate.
- Go to Settings → Smarter Chat. The screen shows your site’s origin. Confirm it’s in the LLMClient’s
allowedOrigins. - Paste the LLMClient’s url into Chatbot url. Fill in Api key only if the LLMClient requires one.
- Click Save Changes, then visit your site.
A chat button now appears in the bottom-right corner of every page. It opens the chat in a panel, nothing loads until a visitor clicks it, and the conversation follows them from page to page.
Settings
| Setting | What it does |
|---|---|
| Show on every page | The floating chat button, on by default |
| Position | Bottom right or bottom left |
| Label | The button’s name, for screen readers |
| Button color | The launcher’s color |
| Start open | Open the chat when the page loads |
| Script source | This site (the plugin’s copy) or the jsDelivr CDN |
Put the chat in a page
For a Support or Help page, turn off Show on every page if you want the chat only there, then use either of these.
- The Smarter Chat block. In the block editor, add the block. You can give it a different chatbot url and a height.
- The shortcode, in any post, page or widget that runs shortcodes.
[smarter_chat height="600px"]
[smarter_chat chatbot="https://sales.3141-5926-5359.api.example.com/" height="600px" width="100%"]
Two filters for developers
Show the button only where you want it, for example on the front page.
add_filter( 'smarter_chat_show_launcher', 'is_front_page' );
Or change the embed script’s options in code, for example a different chatbot on the shop.
add_filter( 'smarter_chat_launcher_config', function ( $config ) {
	if ( function_exists( 'is_woocommerce' ) && is_woocommerce() ) {
		$config['chatbot'] = 'https://sales.3141-5926-5359.api.example.com/';
		$config['label']   = 'Ask about an order';
	}
	return $config;
} );
Option 2, the script tag with no plugin
The embed script is a single tag, so WordPress needs no plugin to load it. Choose where it goes.
One page with a Custom HTML block
- Edit the page in the block editor and add a Custom HTML block.
- Paste the tag, with your LLMClient’s url.
<script
  src="https://cdn.jsdelivr.net/npm/@smarter.sh/ui-chat@0/dist/embed.js"
  data-chatbot="https://support.3141-5926-5359.api.example.com/"
  async
></script>
- Update the page. The chat button appears on that page only.
To embed the chat inside the page instead of as a button, paste this into the block.
<smarter-chat
  chatbot="https://support.3141-5926-5359.api.example.com/"
  height="600px"
></smarter-chat>
<script src="https://cdn.jsdelivr.net/npm/@smarter.sh/ui-chat@0/dist/embed.js" async></script>
Custom HTML blocks that contain <script> need the unfiltered_html capability, which administrators and editors have on a single site. On WordPress multisite only super admins have it, so use Option 1 there.
Every page, with your theme or a snippets plugin
Add this to a child theme’s functions.php, or to a code-snippets plugin, so it survives theme updates.
add_action( 'wp_enqueue_scripts', function () {
	wp_enqueue_script(
		'smarter-chat',
		'https://cdn.jsdelivr.net/npm/@smarter.sh/ui-chat@0.36.10/dist/embed.js',
		array(),
		null,
		array( 'in_footer' => true, 'strategy' => 'async' )
	);
	wp_add_inline_script(
		'smarter-chat',
		'window.SmarterChatConfig = ' . wp_json_encode( array(
			'chatbot'  => 'https://support.3141-5926-5359.api.example.com/',
			'position' => 'bottom-right',
			'label'    => 'Chat with us',
		) ) . ';',
		'before'
	);
} );
wp_enqueue_script can’t add data- attributes to the tag, so the options go in window.SmarterChatConfig, set just before the script. This version pins an exact package release; use @0 to follow every 0.x release.
Any option the package supports works here in camelCase, such as apiKey, open, color, width and height.
Troubleshooting
| Symptom | Likely cause and fix |
|---|---|
| The chat says it isn’t available, or the console shows “blocked by CORS policy” | The site’s origin isn’t in allowedOrigins. https://example.com and https://www.example.com are different origins; add each one visitors use, then re-apply the manifest. |
| No button after saving | A page cache is serving old HTML. Purge your caching plugin, host cache or CDN. |
| No button with an optimization plugin active | Plugins that combine, defer or delay JavaScript (Autoptimize, WP Rocket, LiteSpeed Cache and others) can break the tag. Exclude embed.js from their JavaScript optimization. |
| Script stripped from a Custom HTML block | Your role lacks unfiltered_html. Use the plugin, or ask an administrator. |
| 401 or 403 errors | The LLMClient requires an api key. Enter it in the plugin’s Api key field, or add apiKey to SmarterChatConfig. |
| Inline chat is a thin strip | Set a height, such as 600px, on the block, shortcode or element. |
To see what the chat is doing, add debug: true to SmarterChatConfig (or data-debug="true" on the tag) and open the browser console.
Next steps
- Change the chat’s logo, font and colors in the manifest’s
spec.config.styles, as described in Styling Your LLMClient’s Chat. - Read the plugin’s user guide.
- Not on WordPress? See the companion article, How to Embed a Smarter Chatbot in an HTML Web Page.
Sources
- @smarter.sh/ui-chat on npm (version 0.36.10)
- Smarter Chat for WordPress (version 0.1.0)
- Embedding Smarter Chat